Showing posts with label snack. Show all posts

Sunday, January 8, 2012

Chesapeake Bay Snack Mix


I love the idea of snack mixes like this. I've never made one myself though until this one. And while I do still think that snack mixes are fun, and I love the mixture of stuff in this (though E picked out all the cheddar bunnies), it was insanely salty. In general we try to always reduce the salt in recipes, not add extra salt to our meals, and use reduced sodium products like soy sauce. So maybe for people who don't do this, it wouldn't be as salty? I'd never tried Old Bay seasoning until this recipe, and for those of you haven't tried it either, it tastes kind of like celery. So though I didn't love the recipe, I still think it's fun and maybe you guys can use it for inspiration or just try using less Old Bay seasoning (for less salt).
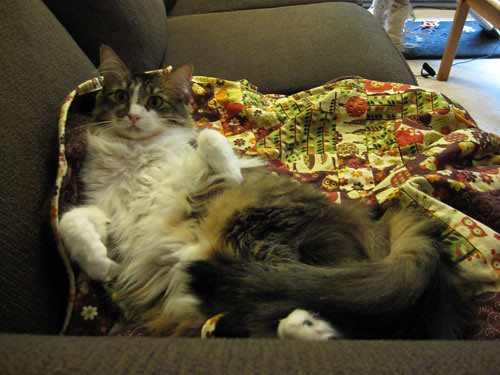

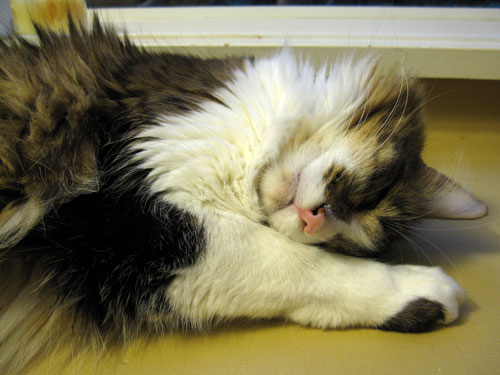
I was looking through this "cat breeds" book in Costco the other day and was reading about maine coons (which we believe Abby is). And reading the traits of the cat was neat because it completely describes Abby. It said how they have dog like behaviour and love to play fetch, and Abby always does that with her little balls, bringing them to us and being annoying until we throw them. And they love to play with water but don't like being wet, and will tip over their water dishes or dump their toys in water, which she also does. And how they like to grab things with their paws which she also tries to do, including her ball when we throw it for her.

If this sounds good, you might also like:
Cheese Straws
Caramelized Onion, Sage and Cheddar Muffins
Garlic Cheese Bread
Pan-Fried Onion Dip

Chesapeake Bay Snack Mix
Adapted from Dana Treat who adapted from Everyday Food, June 2010

8 cups crisp corn, rice cereal, such as Crispix or Chex
3 cups thin pretzel sticks
3 cups Annie's cheddar bunnies
1/2 cup (1 stick) unsalted butter, melted
2 tablespoons vegan Worcestershire sauce
2 tablespoons plus 2 teaspoons Old Bay Seasoning
2 tablespoons fresh lemon juice
1 teaspoon hot-pepper sauce, such as Tabasco

Preheat oven to 250F. In a roasting pan, combine cereal, pretzels, and cheddar bunnies. In a small bowl, mix together melted butter, Worcestershire sauce, Old Bay, lemon juice, and hot-pepper sauce. Pour butter mixture over cereal mixture and stir until ingredients are completely coated. Bake 1 hour, stirring every 15 minutes. Transfer mixture to two rimmed baking sheets to cool completely.

Sunday, November 6, 2011

High Protein Quinoa Almond Fruit Salad


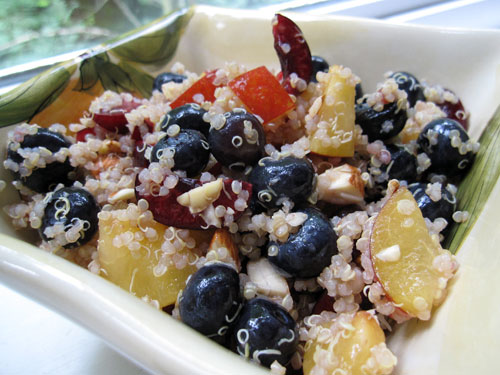
I know I'm terrible for posting dishes that involve out of season fruit or vegetables. But things can always be substituted or recipes can be saved for next year! I thought this quinoa fruit salad was really interesting. It's such a unique way to combine fruit and protein for a great snack. I used yellow plums, blueberries and cherries but I'm sure other fruit like apples, oranges (mandarin oranges!) and persimmons would be good too. Whatever you like, really.

If this sounds good, you might also like:
Cocoa Nibbles
Apple Fennel Celery Salad
Coconut Raspberry Walnut Power Bars
Sunny Jungle Bars

High Protein Quinoa Almond Fruit Salad
Adapted from Oh She Glows

Makes about 4-5 snack size servings

3/4 cup dry quinoa
3 cups plums
2 cups fresh blueberries
1 cup cherries, pitted and sliced
2 tbsp pure maple syrup
1 tsp balsamic vinegar
1 tbsp fresh lime juice
Pinch of kosher salt
1/2 cup almonds, chopped

1. Cook quinoa according to package directions.

2. Meanwhile, chop the fruit and place in a large bowl.

3. Mix the dressing ingredients (maple syrup, balsamic, lime juice, salt) in a small jar and adjust to taste if necessary. Note: You may have to double the dressing recipe if your salad is quite large.

4. Fluff cooked quinoa with a fork and add to large bowl with fruit. Combine. Pour on dressing and mix well. Serve immediately or chill in the fridge until serving time.

Sunday, October 23, 2011

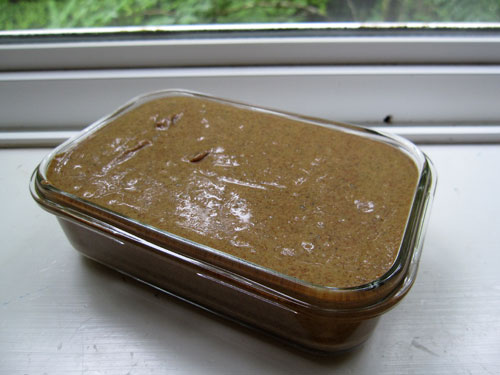
Maple Cinnamon Almond Butter with Hemp, Flax, and Chia Seed


My favourite nut butter is peanut butter - boring yes, but it's so good! Sometimes I buy almond butter, but I don't really like it. I've bought the big jars from Costco because it's so much cheaper, then I'm looking for ways to use it up. But I've never tried making my own almond butter before (or any nut butter for that matter).

I've seen people making different types of nut butters on their blogs, so I finally gave it a try with this maple cinnamon almond butter. And it was really good! Much better than the store bought one. I like having plain nut butter, but it's nice to have something more interesting like this one too. My only complaint is that it's a bit sweet for me. I really hate having sweet things in the morning (unless it's fruit) and so next time I would maybe cut the maple syrup in half, but that's just me.


If this sounds good, you might also like:
Peanut Butter Waffles
Banana Peanut Butter Oatmeal Muffins
Energy Cookies
Peanut Butter Squares with Milk Chocolate and Oats

Maple Cinnamon Almond Butter with Hemp, Flax, and Chia Seed
Adapted from Oh She Glows who adapted from Edible Perspective

Yield 1 & 1/4 cup

2 cup raw almonds
2 tbsp whole flax seeds
2 tbsp hemp seeds
1 tbsp chia seeds
3 tbsp pure maple syrup
1 tsp ground cinnamon
1/2 tsp kosher salt, or to taste
1 1/2 tsp vanilla extract

1. Preheat oven to 300F. Line a baking sheet with parchment or a Silpat mat. In a large bowl, mix together the almonds, flax seeds, hemp seeds, chia seeds, and maple syrup. Spread out almond mixture onto baking sheet and bake for 30 minutes, stirring once half way through.

2. Remove from oven and allow the almond mixture to cool for a few minutes before placing into a food processor with the cinnamon, salt and vanilla. Process for about 10 minutes, stopping to scrape the bowl every as needed (every minute or so). The mixture will be very smooth when ready.

Friday, August 5, 2011

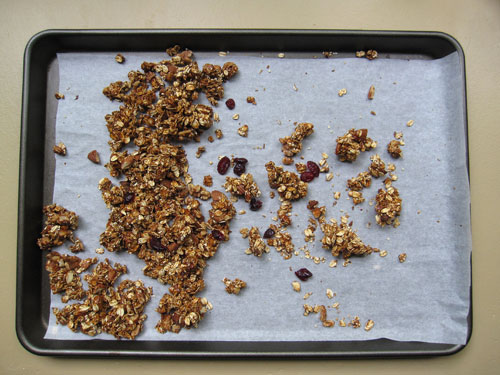
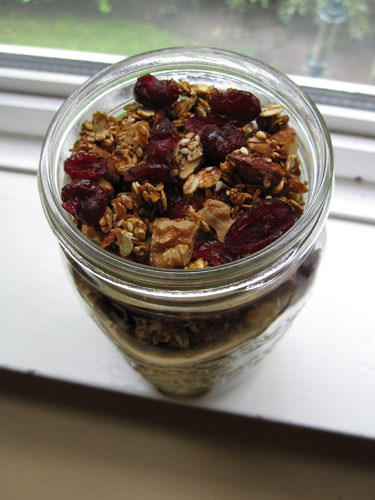
Perfectly Crunchy Granola


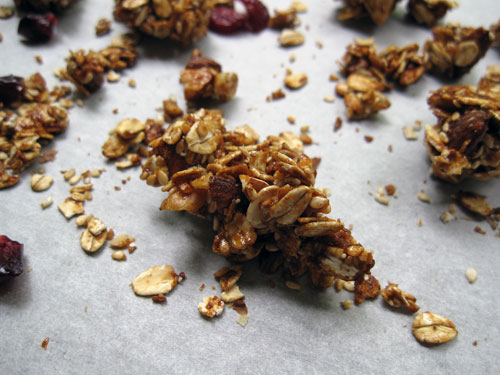
I've made this granola many times. The first for my mom's birthday, the second time when Janet came to visit, and again this past weekend because I just wanted it. It's crunchy and flavourful, and most importantly it clumps up as a good granola should (and only has 1 tbsp oil). Each time I've made it I've changed a few things and it's turned out well every time! Agave instead of brown sugar seems to make it more crispy. Subbing fruit juice for applesauce doesn't make much of a difference. Sometimes I add more cinnamon, the last time I added more oats and less nuts. And I don't add dried fruit if I'm making it for myself because I'm not a big dried fruit fan.


If this sounds good, you might like:
Coconut Raspberry Walnut Power Bars
Granola Bars
Caramel Walnut Chocolate Chunk Granola
Low-Fat Winter Fruit Granola


Perfectly Crunchy Granola
Adapted from Oh She Glows

Yield: ~6 cups

Dry
3 cups old fashioned rolled oats
1/2 cup raw almonds, roughly chopped
1/2 cup raw walnuts, roughly chopped
1/2 cup raw sunflower seeds
1/2 cup raw sesame seeds
2 tbsp unsweetened coconut flakes
1 tsp ground cinnamon
3/4 tsp kosher salt

Wet
4 tbsp brown rice syrup
1 tbsp agave nectar
1 tbsp coconut oil OR other oil
2 tbsp unsweetened applesauce OR fruit juice
2 tbsp peanut butter
1/3 cup packed brown sugar

Optional add-in
2/3 cup dried fruit (ex. cranberries, raisins, dates, apricots)

In a medium pot over medium heat, add the wet ingredients. Stir well. Bring to a boil and then simmer on low for 5-10 minutes, stirring frequently.

In a very large mixing bowl, mix together the dry ingredients.

Add the wet mixture (while still warm!) over top the dry mixture and stir well. It will be very thick and hard to stir, but keep at it until everything is thoroughly combined.

Spread onto a pan lined with parchment paper or a non-stick mat and bake in the oven at 300F for 45 minutes. Remove the pan from the oven every 15 minutes and give the granola a good stir to ensure even baking.

Allow to cool for 20-25 minutes on the pan before serving. The granola will stiffen up as it cools. Once the granola cools, add the dried fruit (if using).

Tuesday, June 2, 2009

Caramel Walnut Chocolate Chunk Granola


My friend, who I frequently talk to about food and am trying to encourage to start a food blog, was telling me about this very delicious sounding caramel walnut chocolate chunk granola in a cookbook she has (The New Whole Grain Cookbook). How could I not immediately want to make it after hearing the recipe name?? She very kindly typed it out and sent it to me. I made it, and ate it and ate it and ate it. It was very addictive. Crunchy and sweet with yummy chocolate bits. The walnuts can be replaced with your favourite nut - I might try pecans next time. I usually eat my granola with yogurt or milk but this granola I just ate out of a bowl. It's a perfect snacky type granola.

If this sounds good, you might like:
Low-Fat Winter Fruit Granola
Sunny Jungle Bars
Banana Crunch Muffins
No Fail Granola

Caramel Walnut Chocolate Chunk Granola
Adapted from The New Whole Grain Cookbook

Makes about 9 cups.

4 cups old-fashioned rolled oats
1 cup walnuts, broken into large pieces
1/4 teaspoon salt
1/4 cup water
1 cup sugar
1/4 cup unsalted butter, sliced
1 teaspoon vanilla extract
4 oz semisweet or bittersweet chocolate, chopped

Line 2 rimmed baking sheets with parchment paper. Preheat the oven to 300F. In a large bowl, mix the oats, nuts, and salt. In a 2-quart heavy-bottomed saucepan, stir together the water and sugar. Over high heat, bring to a boil, moving the pan to keep it mixed (don't stir). Cook until the syrup turns a medium amber, then take it off the heat and add the butter carefully - it will foam and bubble. Stir in the butter with a heat-safe spatula, and then stir in the vanilla. Scrape into the oat mixture and stir immediately. The caramel mixture will start to harden and clump, but it will melt while baking and disperse.

Scrape the oat mixture onto the prepared pans, and spread it out into rough chunks. Bake for 15 minutes, then stir well. The caramel will be liquefied and soaking into the oats more evenly. Bake for 15 minutes more.

Remove to cooling racks. When cool, break the granola into chunks and mix with the chocolate chunks.

Friday, March 13, 2009

Low-Fat Winter Fruit Granola


I really love the sweet crunchy style granola but when I make granola at home it feels counterproductive to add so much oil and sugar (to something that to me is supposed to be healthy) so I opt for granola recipes like this one. And this one was good - though I wouldn't add the crystallized ginger next time. I like ginger but don't love it in sweet things. I mistakenly added the dried fruit too early (instead of stirring it in at the very end) but it wasn't all bad because it made the dried apples wonderfully crunchy. I saw this chocolate chocolate chunk granola at Whole Foods not too long ago... I really must make an exception to my "healthy granola" rule and try making that one!

Some people have asked where I got the cup from - it was a gift many years ago and I have no idea where my friend got it from! It has Totoro on the other side though.

Other healthy snacks:
Sunny Jungle Bars
Cocoa Nibbles
No Fail Granola
Applesauce-Oat Bran Muffins


Low-Fat Winter Fruit Granola
Adapted from The Best Life Diet Cookbook found on Ezra Pound Cake

You can easily replace the almonds with another nut, the dried fruit with whatever other dried fruit you want, and omit the ginger. I didn't use almond extract - just vanilla.

Makes 24 1/4-cup servings

4 cups regular rolled oats
1/4 cup unprocessed wheat bran
2 tablespoons canola oil
1/3 cup maple syrup
1 1/2 teaspoons vanilla extract
1/2 cup sliced almonds
1/2 cup chopped dried pears or apples
1/4 cup dried cranberries
1/4 cup chopped dates
2 tablespoons chopped crystallized ginger

Preheat the oven to 325F.

Combine the oats and bran in a large bowl.

In a small pan over medium heat, stir in the canola oil, maple syrup, and vanilla and almond extracts. When the mixture begins to bubble, pour it over the oat mixture and mix well.

Pour it onto a baking sheet and bake for about 10 minutes. Add the almonds and stir the mixture thoroughly. Continue to bake until the oats and almonds are lightly toasted, about 10 minutes more, stirring again halfway through.

Stir in the rest of the ingredients.

Bake until the oats are crisp, about 5 minutes longer.

Remove the pan from the oven and stir the mixture. Let the granola cool for 5 minutes, the stir again.

When completely cool, store the granola in an air-tight container for up to 4 weeks.

Monday, August 18, 2008

Cocoa Nibbles


As soon as I saw these cocoa nibbles that the wonderfully talented Ricki (of Diet, Dessert and Dogs) posted, I knew I had to make them. And make them I did, a few days later - which is rare for me since I have a humongous (and insanely growing) list of recipes I've saved from food blogs to make one day. I guess I should explain what they are eh? Well they're designed after the Lara bars, so imagine a really moist perfectly chocolatey little treat (that you don't have to feel guilty about).

These cocoa nibbles were just as good as I'd hoped and while they did really test the power of my little food processor, they were easy to make. Not only are they a healthy snack, but they can really satisfy a chocolate craving (with the use of cocoa powder alone!) I was so very impressed by these and will make them again and again. Unfortunately I put this batch in a container that stank like onion so I only got to enjoy a few.

Other healthy snacks:
No Fail Granola
Mini Pear Loaves
Applesauce Oat Bran Muffins
Pumpkin Pecan Raisin Muffin

Cocoa Nibbles
Adapted from Ricki at Diet, Dessert and Dogs

Ricki suggests adding mint, chili powder, lemon or cinnamon but this is the version I tried and fell in love with.

1/2 cup (80 g) raw almonds
1 1/4 cups (about 150 g) unsweetened dried dates, chopped
2 tbsp (20 g) cocoa powder
1 tsp vanilla

In a food processor, process the almonds, dates, and cocoa until you have what looks like a fine meal. Sprinkle with vanilla and continue to process until the mixture comes together as a ball that rolls around the edge of the processor bowl (this may take a while–up to 5 minutes or so; occasionally stop and scrape sides of processor to push the mixture toward the blades).

The “dough” is ready when, if you pinch some and press it between your fingers, it sticks together readily and looks a bit shiny. (If this isn't happening, add a couple of teaspoons of water.) The mixture should NOT be as soft as a cookie dough, but more like clay.

Place a clean piece of plastic wrap on the counter and turn the mixture onto it. Using your hands, form the mixture into a log about 8 inches long. Try to compress the mixture as much as possible so you have a very dense log. Wrap with the plastic and roll the log one or two times, compressing it with your hands, to squeeze out any air spaces.

Refrigerate the dough for at least 2 hours or overnight. Take the dough from the fridge and slice it into little medallions about 1/2 to 3/4 inch thick.