Showing posts with label cakes. Show all posts

Monday, February 27, 2012

Hummingbird Cake


It's been so long since I've posted a cake recipe!! And I forgot to take a picture of the whole cake, oops.

I made this for a family dinner and everyone seemed to enjoy it. The cake has banana, pineapple and pecans, and then it's covered in a cream cheese frosting. It is my firm belief that you can never go wrong with cream cheese frosting. The cake mostly tasted like banana and I was disappointed to not taste the pineapple. But I suppose the cake can be forgiven for that as it was really moist and soft.

I'm glad I tried it and would recommend it if you like banana cakes, but for me I'd rather try a different cake next time.

If this sounds good you might also like:
Rustic Chocolate Chip Banana Oat Cake
Apple Walnut Cake with Caramel Cream Cheese Frosting
Toasted Pecan Eggnog Ring
Maple-Walnut Cake

Hummingbird Cake
Adapted from The Magnolia Bakery Cookbook

Cake
3 cups all purpose flour
1 tsp cinnamon
1 tsp baking soda
1 tsp salt
1 1/4 cups canola oil
2 cups sugar
3 large eggs
1 1/2 tsp vanilla extract
2 cups mashed, very ripe bananas
1 eight-ounce can crushed pineapple in unsweetened juice, drained
1/2 cup chopped pecans

Frosting
2 eight ounce packages cream cheese, softened slightly, cut into small pieces
1/2 cup (1 stick) unsalted butter, softened slightly, cut into small pieces
1 1/2 tsp vanilla extract
3 cups sifted confectioners' sugar

Preheat oven to 325F. Prepare two 9"x2" round cake pans by lining the bottom with parchment paper and greasing the sides with butter.

In a large bowl, whisk together the flour, cinnamon, baking soda and salt. Set aside.

In the work bowl of an electric mixer (fitted with the paddle attachment), add the oil and sugar. Beat on medium until smooth, about 3 minutes. Add the eggs one at a time and beat until light, about 1 to 2 minutes. Add the vanilla, bananas and pineapple. Then add the dry ingredients in thirds, beating after each addition until smooth. Fold in the pecans.

Divide the batter between the prepared pans and bake for 40 to 50 minutes or until a toothpick inserted in the center comes out clean. Let cakes cool in pans for 10 minutes, then remove from pans and cool completely on wire racks.

To make the frosting: In the work bowl of an electric mixer (fitted with the paddle attachment), add the cream cheese and butter. Beat until smooth, about 3 minutes. Add the vanilla extract. Gradually add the sugar and beat until well incorporated.

When cake has cooled, spread some of the frosting between the layers, then frost the top and sides of the cake with the cream cheese frosting.

Sunday, December 4, 2011

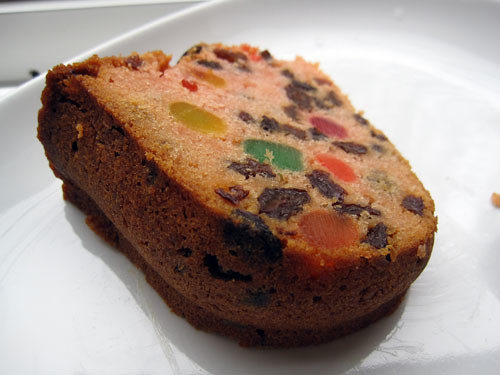
Gumdrop Cake

Have you guys started planning out what Christmas baking you're going to do? I loooove making my list and would love to hear what you guys are planning on making or have already made. So far I've made:
+Andes Chocolate Mint Cookies
+Snickerdoodles
+Pecan Tassies
+my grandma's shortbread
+this gumdrop cake!

gumdrop cake


I plan on also making my grandma's chocolate coconut snowballs, and maybe some other things. But anyway, onto the gumdrop cake. We were waiting in line at the grocery store and I came across this recipe in a Canadian Living holiday magazine. Gumdrop cake!! That sounded exciting. I've never baked with gumdrops. And it has a jar of maraschino cherries, which I love. Basically it's like a different version of fruitcake, though I've never made fruitcake and have rarely eaten it. But that's what I think.

gumdrop cake


The recipe they printed in the magazine was a bit vague so I was scared how it would turn out but I'm happy with the results. The cake is tinged pink from the maraschino cherry "juice". I wasn't sure how I'd like gumdrops in a cake but it turns out I love them - at least in this style of cake. The cherries and raisins are great too, the cherries more than the raisins. I was wary of the almond extract as I detest that fake almond flavour, but I went with it. And it turned out successfully. It's not something you'd want to eat a lot of given its strong flavour and sweetness, but to have a little nibble, it's great and something different.

I love giving out Christmas baking, but I'm just wondering - is anyone else as OCD as me about it? I can't handle putting different types of cookies with different textures, dryness levels and flavours all in one tin. The mint from the mint chocolate cookies might make the snickerdoodles minty! Or the shortberad might absorb moisture from the pecan tassies and make them dry! I love how a mixed tin of cookies looks, but I have to put them in separate bags first, then into the tin. What do you do? Anyone have a good solution to my cookie mingling problem?

If this sounds good, you might also like:
Perfection Pound Cake with Lemon Curd
All-In-One Holiday Bundt Cake
Cream Cheese Pound Cake and Strawberry Sauce
Toasted Pecan Eggnog Ring

Gumdrop Cake
Adapted from Mrs. P. Ramsay in Victoria (found in Canadian Living holiday magazine)

The original recipe stated "1 package of raisins, 1 package of gumdrops and 1 jar of maraschino cherries". Not sure what size was intended to be used, but I just used what was available at the store and have noted the sizes I used in the recipe.

375 g package raisins
375 mL jar maraschino cherries, drained with juice reserved, and sliced in half
200 g package gumdrops
1 1/2 cups unsalted butter, room temperature
1 1/2 cups sugar
4 eggs, room temperature
1 tsp vanilla extract
1 tsp almond extract
1 cup milk plus juice from the cherries (I used unsweetened almond milk)
4 1/2 cups all purpose flour
1 tsp salt
2 tsp baking powder

Soak the raisins for 1/2 hour in hot water. Drain well. Mix together the raisins, cherries, gumdrops and 1 cup of the flour. Set aside.

Preheat oven to 325F. Prepare a bundt pan by buttering it, making sure to get into all the crevices. Cream together the butter and sugar. Add in the eggs and mix well. In a separate bowl, combine the vanilla extract, almond extract, milk and juice from the cherries. In another separate bowl, whisk together the 3 1/2 cups flour, salt, and baking powder. With the mixer on low, alternately add the flour mixture and liquid mixture, starting with the flour mixture. Mix until just combined. Fold in the fruit mixture.

Pour the mixture into the prepared bundt pan and smooth the top. Bake at 325F for 30 minutes, then 300F for 1 1/2 hours. Remove from the oven and let it cool completely in the pan before turning it out.

Thursday, September 22, 2011

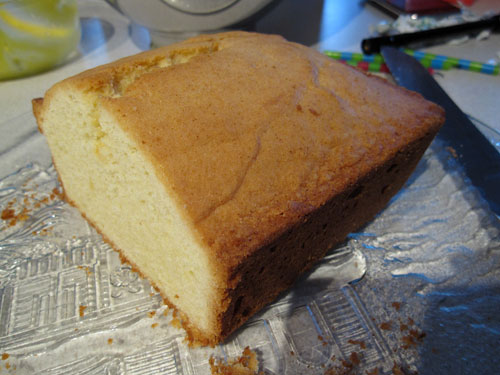
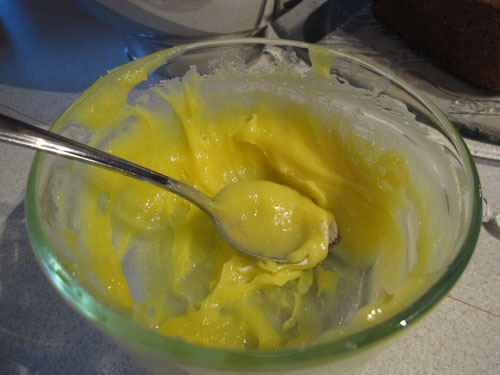
Perfection Pound Cake with Lemon Curd


For my brother's birthday (way back in May, wow I'm behind) he requested pound cake with lemon curd and whipped creme fraiche. I've made this Cream Cheese Pound Cake before and while I loved it, I wanted to try a regular pound cake. When we were in Mykonos, they offered pound cake at breakfast every morning and I always had a slice. It's not something I usually think to make (or eat) but I really love it. So soft but dense, and not overflavoured. Just delicious.


Anyway, so this pound cake was good though I would recommend making it the day before you intend to serve it as the edges were crisp on day 1 (which I love actually). Leaving it overnight would allow everything to soften. The lemon curd I made to go with it was really good too. As for the whipped creme fraiche, I didn't really know what I was doing. I tried to whip it like whipped cream and added a touch of sugar. It didn't hold very well though - maybe it needs to be mixed with a bit of whipped cream? Anyway overall the combination was nice, though the pictures are a bit of a mess as they were kind of an afterthought taken at my mom's house. I think it was my sister in law who had a brilliant idea for how to serve it. A slice of cake on it's side, with whipped creme fraiche in an oval shape, and a circular dollop/ball of lemon curd in the middle, so it looks like an egg.

If this sounds good, you might also like:
Cream Cheese Pound Cake and Strawberry Sauce
Tres Leches Cake
Plum Sour Cream Kuchen
Sweetened Condensed Milk Cake

Perfection Pound Cake
Adapted from Baking: From My Home to Yours

2 cups all-purpose flour or 2 1/4 cups cake flour
1 teaspoon baking powder
1/4 teaspoon salt
2 sticks (8 ounces) unsalted butter, at room temperature
1 cup sugar
4 large eggs, at room temperature
1 teaspoon vanilla extract

Center a rack in the oven and preheat the oven to 325F. Butter a 9×5-inch loaf pan or an 8"x4" loaf pan. Put the pan on an insulated baking sheet or on two regular baking sheets stacked one on top of the other.

Whisk together the flour, baking powder, and salt.

Working with a stand mixer fitted with a paddle attachment, beat the butter and sugar on high speed until pale and fluffy for 5 minutes. Scrape down the bowl. On medium speed, add the eggs one at a time, beating for 1 to 2 minutes after each egg goes in. As you’re working, scrape down the bowl and beater often. Mix in the vanilla extract. Reduce the mixer speed to low and add the flour, mixing only until it is incorporated. Scrape the batter into the pan and smooth the top.

Put the cake into the oven to bake, and check on it after about 45 minutes. If it’s browning too quickly, cover it loosely with a foil tent. If you’re using a 9×5 pan, you’ll need to bake the cake for 70 to 75 minutes. The cake is done when a thin knife inserted deep in the center comes out clean.

Remove the cake from the oven, transfer the pan to a rack and let rest for 30 minutes.

Run a blunt knife between the cake and the sides of the pan and transfer the cake to a wire rack. Cool to room temperature.

Lemon Curd
Adapted from Martha Stewart's Baking Handbook

Makes 2 cups

8 large egg yolks
Finely grated zest of 2 lemons
1/2 cup plus 2 tbsp freshly squeezed lemon juice (about 3 lemons)
1 cup sugar
1/8 tsp salt
1 1/4 sticks (10 tbsp) unsalted butter, cold, cut into pieces

Combine yolks, lemon zest, lemon juice, and sugar in a heavy-bottom saucepan; whisk to combine. Cook over low-medium heat, stirring constantly with a wooden spoon (be sure to scrape the sides of the pan), until the mixture is thick enough to coat the back of the spoon, 8 to 10 minutes, and registers 160F on an instant read thermometer. (My stove seems to run a bit hot, so you might need to increase the temperature to medium.)

Remove saucepan from heat. Add salt and butter, one piece at a time, stirring until smooth. Strain through a fine sieve into a medium bowl and cover tightly (ex. with a fitted lid or plastic wrap). Refrigerate until chilled and set, at least 1 hour or up to 1 day.

Tuesday, August 16, 2011

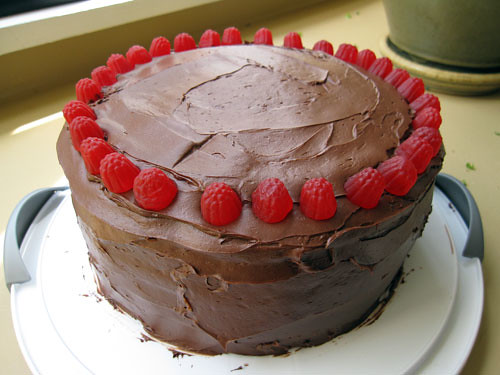
Chocolate Raspberry Cake


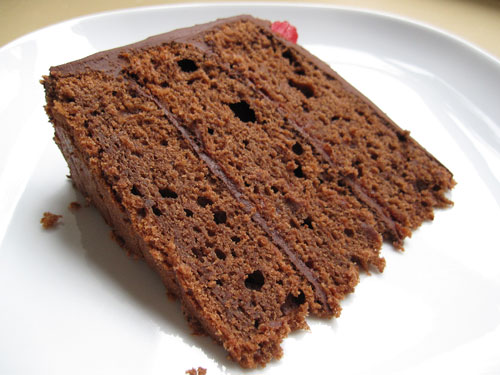
I made this cake last March for my stepdad's birthday. It sounded like it would be really yummy with 3 layers of chocolate cake, and layers of chocolate sour cream filling and raspberry jam. But it was just okay. I really like sour cream frosting, but if you don't know this is sour cream frosting and take a bite, I'm not sure if you'd like it. (It tastes a bit sour, shockingly!) I like this sour cream frosting better though. The cake was quite dense, and is best at room temperature so it can soften a bit and isn't quite so crumbly.


Fresh raspberries would have been nice on top, but at the time they weren't very available so I went with the red berry candy. I seem to have lost my desire to make layer cakes like this so this may be the last one you'll see for a while! (Though I haven't been posting layer cakes very often anyway.)

If this sounds good, you might also like:
Black Forest Mousse Cake
Chocolate Peanut Butter Mousse Cake
Chocolate Beet Cake with Chocolate Sour Cream Frosting
Orange Chocolate Chunk Cake

Chocolate Raspberry Cake
Adapted from The Complete Canadian Living Baking Book

1 1/2cups butter, softened
2 1/4 cups granulated sugar
3 eggs
1/4 cup thawed raspberry cocktail concentrate
2 tsp vanilla
3 cups all-purpose flour
3/4 cup cocoa powder
1 1/2 tsp baking soda
1 1/2 tsp baking powder
1/2 tsp salt
2 cups sour cream

Filling and Icing:
1 lb (454 g) bittersweet or semisweet chocolate , chopped
2 1/3 cups sour cream
1/4 cup granulated sugar
1 tsp vanilla
1/3 cup seedless raspberry jam

Preparation
Grease sides of three 9-inch (1.5 L)round metal cake pans; line bottoms with parchment paper. Set aside.

In large bowl, bet butter with sugar until fluffy. Beat in eggs, 1 at a time, then raspberry concentrate and vanilla. In separate bowl, sift together flour, cocoa, baking powder, baking soda and salt ; sift again. Stir into butter mixture alternately with sour cream, making 3 additions of dry ingredients and 2 of sour cream. Scrape into prepared pans, smoothing tops.

Bake in centre of 350°F (180°C) oven until tester inserted in centre comes out clean, 30 to 35 minutes. Let cool in pans on racks for 20 minutes. Turn out onto racks; let cool completely. Remove paper.

Filling and Icing:
In large bowl over saucepan of hot (not boiling) water, melt chocolate, stirring occasionally. Remove from heat. Whisk in half of the sour cream; whisk in remaining sour cream until smooth. Whisk in sugar and vanilla.

Brush off any crumbs from cake layers. Place 1 layer on flat cake plate. Spread top of layer with 1/3 cup icing. Spread jam over bottoms of remaining 2 layers. Place 1 layer, jam-side down, over icing.

Spread 1/3 cup icing on top of second layer; top with third layer, jam-side down. Spread remaining icing over side and top of cake. Refrigerate until firm, about 30 minutes.

Friday, July 22, 2011

Rustic Chocolate Chip Banana Oat Cake


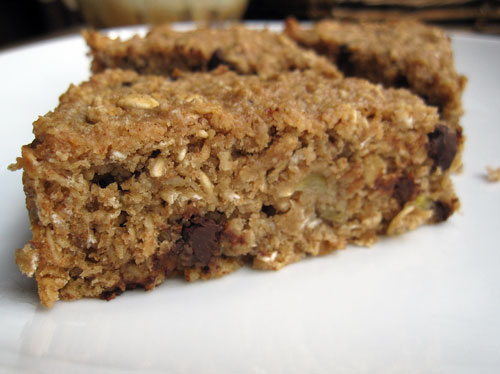
We always have bananas in our house - one for everyday of the week for each of us. But rarely do they get brown enough to bake with, and rarely do I want to bake with them. But such an occasion occurred and I was inspired to make this rustic chocolate chip banana oat cake. Oats and oat flour are the base (I love oats!), with the addition of both mashed banana and diced banana. And chocolate chips (E was very happy about this). The cake was really moist and delicious. The only improvement would be to add walnuts next time, so I've included them in the recipe though I didn't add them to my cake.


Miss Abbyton


PS I am currently obsessed with jigsaw puzzles!! Growing up I used to do puzzles when visiting my grandma, or at Christmas time with my mom. Costco had puzzles a couple of weeks ago so I bought 2 and now have been searching on Amazon for my next puzzles. Anyone else a puzzle geek like me?

If this sounds good, you might also like:
Apple Cinnamon Bread
Coconut Banana Muffins
Banana Peanut Butter Oatmeal Muffins
Mom's Banana Apple Bread

Rustic Chocolate Chip Banana Oat Cake
Adapted from Oh She Glows

2 cups rolled oats, processed into a flour
1/2 cup rolled oats
1/2 cup Sucanat
1/2 tsp ground cinnamon
1/8 tsp ground cloves
1 tsp baking powder
1/2 tsp salt
2 tbsp safflower oil
2 medium very ripe bananas, peeled
1/3 cup applesauce
1/4 cup soy milk
1 tsp pure vanilla extract
Fold in: 1/2 cup dark chocolate chips; 1/4 cup walnuts, chopped; 1 ripe banana, cut into chunks

1. Preheat oven to 350F and lightly grease a 8 inch (4 cup) casserole dish or 8” cake pan. Take 2 cups of regular oats and process them in a food processor until flour like in consistency.

2. In a large bowl, whisk together the dry ingredients (processed rolled oats, rolled oats, sugar, spices, baking powder, and salt).

3. In another bowl, mix together the oil, applesauce, soy milk, and vanilla. Add in the two peeled bananas and smash into the wet ingredients until smooth.

4. Add the wet mixture to the dry and stir until just combined. Fold in the chips, walnuts, and chopped banana.

5. Spread into prepared pan and bake for 35 minutes at 350F or until a toothpick comes out clean. The cake must be cooled for at least 15-20 minutes before attempting to remove.

6. Store in the fridge for up to 3 days.

Sunday, July 3, 2011

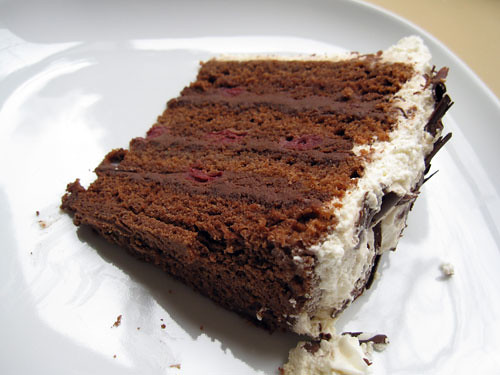
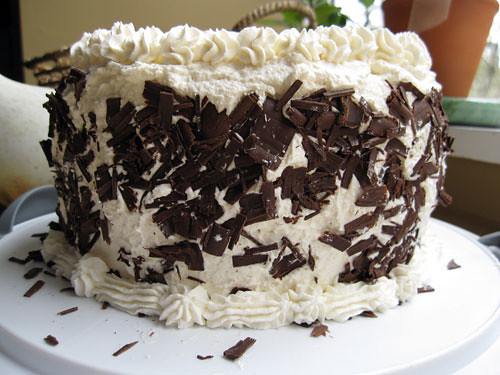
Black Forest Mousse Cake


Looking back over my archives, I haven't posted a cake recipe since last October! I don't make cakes very often, as you can see. I seem to be leaning more towards making healthier baked goods now. But birthdays are another thing, so for E's birthday I made this black forest mousse cake, which combine two of his favourite things - black forest cake and mousse. I was happy that he really loved it and so did everyone else.


The cake is really moist and soft, and it's not your typical black forest cake that I always find to be sickly sweet and have too much cherry. The cherry flavour wasn't too strong as I used a smaller jar of cherries than called for (due to what my grocery store had) and omitted the kirsch. While we enjoyed it this way, I'd like to try it with the recommended cherry amount and kirsch too. Another thing I'd try is doing a whipped cream middle layer, instead of 3 layers of mousse.


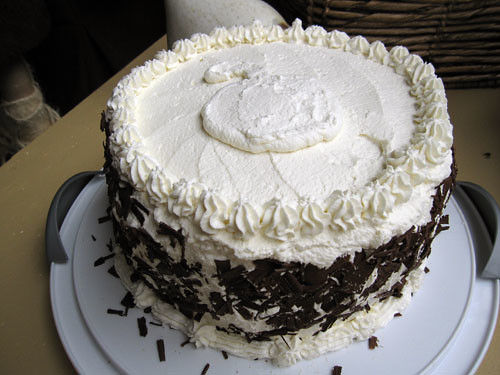
Usually I don't ever use icing tips/bags for decorating cakes - I like to keep things simple. But this time I decided to try. It doesn't look fancy (the cherry I drew on top is kind of silly) but I had a lot of fun! Trying to get the chocolate shavings on the side of the cake was also a challenge. Methods I tried included pressing it in with my hand, throwing it at the cake, and putting the shavings on parchment and then pressing them onto the cake. (I found the last method the best.)

If this sounds good, you might also like:
Chocolate Peanut Butter Mousse Cake
Apple Walnut Cake with Caramel Cream Cheese Frosting
Chocolate Beet Cake with Chocolate Sour Cream Frosting
Strawberry Cream Cake

Black Forest Mousse Cake
Adapted from The Complete Canadian Living Baking Book

I used a 500 mL jar of sour cherries since that's what the grocery store had but would recommend using the full 796 mL for more cherry goodness. I also didn't use any kirsch, but if you have it I would use it. (Add 1 tbsp to cherry syrup, 2 tbsp to chocolate mousse.)

1 jar (28 oz/796 mL) sour cherries
2/3 cup granulated sugar
4 4oz oz(113 g) (113 g) semisweet chocolate, chopped
2 1/2 cups whipping cream
1 tsp vanilla

Chocolate Mousse
6 oz semisweet chocolate, chopped
2 cups whipping cream

Chocolate Cake
1 cup unsalted butter, softened
1 1/2 cups granulated sugar
2 eggs
1 tsp vanilla
2 cups all purpose flour
1/2 cup cocoa powder
1 tsp baking powder
1 tsp baking soda
1/2 tsp salt
1 1/2 cups buttermilk

Grease sides of two 8-inch (2 L) springform pans or two 8-inch (1.2 L) round metal cake pans; line bottoms with waxed paper. Set aside.

Chocolate Cake:
In large bowl, beat butter with sugar until light and fluffy; beat in eggs, 1 at a time. Beat in vanilla. In separate bowl, sift together flour, cocoa, baking powder, baking soda and salt. With wooden spoon, stir into butter mixture alternately with buttermilk, making 3 additions of flour mixture and 2 of buttermilk. Spoon into prepared pans, smoothing tops.

Bake in 350°F oven until cake tester inserted in centre comes out clean, about 35 minutes. Let cool in pans on rack for 20 minutes. Remove from pans; let cool completely on rack. (Make-ahead: Wrap in plastic wrap and refrigerate for up to 24 hours or overwrap in heavy-duty foil and freeze for up to 2 weeks.)

Meanwhile, in sieve over bowl, drain cherries, pressing lightly; reserve 1/3 cup (75 mL) of the juice. In small saucepan, bring 1/3 cup of the sugar and reserved juice to boil; boil until reduced to 1/2 cup, about 5 minutes. Let cool.

In heatproof bowl over saucepan of hot (not boiling) water, melt chocolate. Pour into foil-lined 5-3/4- x 3-1/4-inch (625 mL) loaf pan. Refrigerate until set, about 2 hours. Unmould; let stand until slightly softened, about 10 minutes.

Holding chocolate with foil, slowly draw vegetable peeler across narrow side of block to make curls; with toothpick, transfer to waxed paper–lined baking sheet. (Make-ahead: Lightly cover and refrigerate for up to 2 days.)

Chocolate Mousse
Place chocolate in large heatproof bowl. In saucepan, bring cream just to boil; pour over chocolate, whisking until melted and smooth. Refrigerate until chilled, about 1 hour. Beat until soft peaks form. Cover and set aside.

Slice each cake layer in half horizontally. Brush each cut side with 2 tbsp of the cherry syrup; let stand for 5 minutes.

Meanwhile, in large bowl, whip cream with remaining sugar and vanilla.

Place 1 cake layer on cake plate; spread with 1 cup of the mousse. Arrange 3/4 cup of the cherries over top. Repeat for second and third layers; top with remaining layer. Spread reserved whipped cream over top and side. Decorate with remaining cherries. Gently press chocolate curls onto side. (Make-ahead: Loosely cover with plastic wrap and refrigerate for up to 24 hours.)

Friday, October 15, 2010

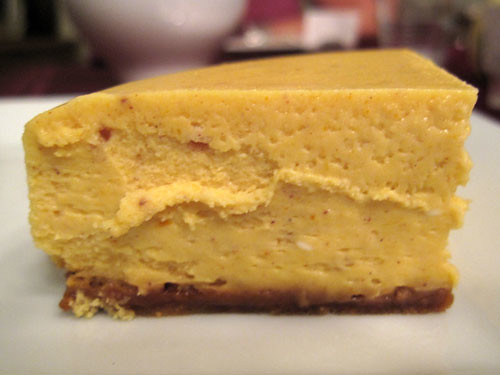
Pumpkin Cheesecake


I know I know, this photo (and piece of cheesecake) is a total mess! But I really wanted to share this recipe for pumpkin cheesecake with you, and due to the business of Thanksgiving, I didn't get around to taking a nicer photo of it. But I thought it would be better to have something to show you guys rather than nothing, right? Because this cheesecake is so good.


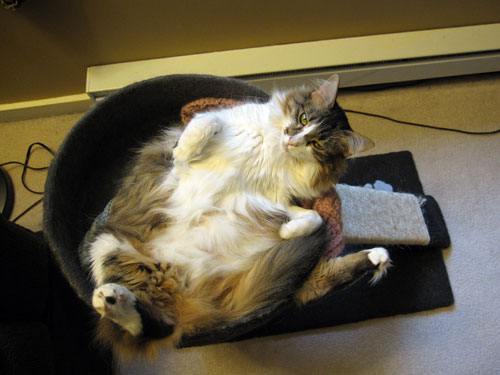
I'm hoping this Abby photo can make up for the cheesecake one!


The first time I made it was a few Thanksgivings ago. Usually we have pumpkin pie with whipped cream but I wanted to try something different. I warned my brother beforehand because I knew he'd be disappointed if the dessert was something other than pumpkin pie, and now I've got him hooked on this cheesecake. I like to serve it with whipped cream, and if you're feeling fancy you can sprinkle a bit of cinnamon on top. I've also eaten it with ice cream which of course is good too. I would recommend using a 10" springform pan (as you're supposed to) and not being like me and using a 9" springform pan that just isn't big enough. It didn't overflow but it rose up a lot, and resulted in a lot of cracking.


EDIT! October 10, 2011 - I made this cheesecake again for Thanksgiving and this time got a better photo, and better results actually. I halved the filling recipe (but not the crust), and used my four 4" cheesecake pans. I used a water bath and baked them for about 50-55 minutes. They didn't crack and were the most perfect texture. Creamy and soft, and the edges weren't rubbery or overcooked as seems to happen with other cheesecakes I've made.

If this sounds good, you might also like:
Brown-Sugar Apple Cheesecake
Rich Chocolate Cheesecake
Lemon Cheesecake
Cheesecake Pops

Pumpkin Cheesecake
Adapted from The Best of The Best and More

Ginger Snap Crust
1 cup crushed gingersnaps
3 tbsp butter, melted
1 tsp cinnamon
2 tbsp brown sugar

Filling
4 8-oz (250 g) packages cream cheese, softened
1 1/2 cups sugar
5 eggs
1/4 cup flour
2 tsp pumpkin pie spice
14 oz (398 mL) can pumpkin
2 tbsp whipping cream (original recipe calls for rum)

1 cup whipping cream, whipped
Ground cinnamon, optional

Crust: Combine ingredients. Lightly grease a 10" springform pan and line bottom with crumb mixture. Pat firm and chill.

Filling: Preheat oven to 325F. Beat softened cream cheese till fluffy. Slowly beat in sugar. Add eggs, 1 at a time, beating well after each addition. Gradually beat in flour, spices, pumpkin and 2 tbsp whipping cream. Pour batter over crust. Bake for 1 1/2 to 1 3/4 hours, or until filling is set. Cool for an hour. Refrigerate several hours. Garnish with whipped cream and a sprinkle of cinnamon (optional).

Monday, October 4, 2010

Chocolate Peanut Butter Mousse Cake


Every time I go to post about a cake I've made, I always think "I really should make cakes more often!" Yet I seem to make them fairly infrequently. Maybe I should set up some sort of challenge for myself like one new cake a month or something, hmm. I made this chocolate peanut butter mousse cake when we had some people over for dinner and we really liked it. Chocolate wafer crust, topped with a layer of peanut butter mousse, which is topped with a layer of chocolate mousse, which is then topped with bittersweet chocolate glaze. I was scared the mousse layers might deflate but they seemed to hold their own. I wish I'd taken a photo of a slice of the cake because it cuts very nicely, but at that point I just wanted to eat it! The cake is really rich so a thin slice is enough. Though if you have leftovers in your fridge, a thin slice might turn into many thin slices.

The only caution I have with this cake is that the bittersweet chocolate glaze has you add vanilla extract to the chocolate/cream mixture, and once I added the vanilla it made the chocolate kind of lumpy. It tasted fine and set up okay, but I wouldn't add it next time.


If this sounds good, you might also like:
Rich Chocolate Cheesecake
Chocolate Volcanoes
Chocolate Mousse Layer Cake
Chocolate Pots de Creme

Chocolate Peanut Butter Mousse Cake
Adapted from The Cake Book

Makes on 9 inch cake, serving 10

Chocolate Wafer Crust
1 1/2 cups (180 g) Nabisco Famous chocolate wafer cookie crumbs
4 tbsp unsalted butter, melted

Peanut Butter Mousse
5 ounces cream cheese, softened
2 tbsp unsalted butter, softened
1 1/4 cups (144 g) confectioners' sugar
3/4 cup creamy peanut butter
1/4 tsp salt
2 1/2 cups heavy cream

Chocolate Mousse
5 ounces bittersweet chocolate, coarsely chopped
3.5 ounces milk chocolate, coarsely chopped
1/3 cup whole milk
1/3 cup granulated sugar
1 tsp vanilla extract

Bittersweet Chocolate Glaze
3 ounces bittersweet chocolate, chopped
1/3 cup heavy cream
1/2 tsp vanilla extract (I added this but wouldn't next time)

Make the crust
1. Lightly grease the bottom of a 9x3 inch springform pan. In a medium bowl, stir together the cookie crumbs with the melted butter until combined. Pat the crumb mixture into the bottom of the pan in an even layer. Refrigerate the crust while you make the peanut butter mousse.

Make the peanut butter mousse
2. In the bowl of an electric mixer, using the paddle attachment, beat the cream cheese and butter at medium-low speed until creamy, about 1 minute. Add the confectioners' sugar and mix until well blended. Add the peanut butter and salt and mix until blended, scraping down the sides of the bowl as necessary. Remove the bowl from the mixer stand and set aside.

3. In a clean mixer bowl, using the whisk attachment, beat the heavy cream at high speed until soft peaks form. Gently fold 1 cup of the whipped cream into the peanut butter mixture until almost blended. Fold in another 1 1/2 cups of the whipped cream until completely blended.

4. Scrape the mousse into the prepared pan and spread it into an even layer. Refrigerate while you make the chocolate mousse. Cover the remaining whipped cream and refrigerate until ready to use.

Make the chocolate mousse:
5. Place the chocolates in the bowl of a food processor and process until finely ground. (Leave the chocolate in the food processor.)

6. In a small saucepan, combine the milk and sugar and bring to a boil over medium heat, stirring frequently until the sugar dissolves. With the food processor running, pour the hot milk through the feed tube, and process until the chocolate is completely melted. Scrape down the sides of the bowl, add the vanilla extract, and process until blended. Scrape the mixture into a large bowl.

7. Using a rubber spatula, gently fold one-third of the reserved whipped cream into the mousse. Fold in the remaining cream until completely blended. Scrape the mousse onto the peanut butter mousse layer. Loosely cover the cake and freeze for at least 1 hour, until firm.

Bittersweet Chocolate Glaze
8. Place the chocolate in the bowl of a food processor and process just until finely ground. (Leave the chocolate in the food processor.)

9. In a small saucepan, bring the cream to a boil. Remove from the heat and add the chocolate to the pan. Stir until the chocolate is completely melted and the glaze is smooth. Stir in the vanilla extract. Transfer the glaze to a small bowl. Let cool for about 10 minutes before using.

Glaze the cake
10. Run a sharp thin-bladed knife under hot water and wipe dry, then run the knife between the cake and the side of the pan to release the cake; reheat the knife as necessary. Remove the side of the pan. Pour the glaze over the top of the cake, trying not to let it drip down the sides, and, using a small metal spatula, spread the glaze evenly over the top of the cake.

11. Refrigerate the cake for at least 1 hour before serving.

12. To serve, slice the cake with a hot knife, wiping it clean between each cut.

Store in the refrigerator, loosely covered, for up to 3 days.

Tuesday, August 31, 2010

Apple Walnut Cake with Caramel Cream Cheese Frosting


I'm back! Thanks so much everyone for the good wishes for our vacation. We had a really good time relaxing, watching the nightly shows, exploring the Alaskan cities, and I have a new addiction to slot machines (since I now understand the way the buttons work haha).


The Hubbard Glacier, which looks small but we're just a distance from it in this photo.


And we ate way too much. There was a buffet and one restaurant, where we ate dinner almost every night. But buffets are seriously dangerous. You don't wait to eat until you're hungry, you wait to eat until there's room in your stomach. So while I can't wait to see what you guys have all been up to and what you've been cooking, I've been a little wary of looking at lots of food photos right now. I'm sure I'll get over it soon though! It was nice not having to cook, but I'm happy to be back to my regular food.


Our cruise ship with the tender boat. I had no idea what tendering meant before!


Anyway, sorry to be so mean and withhold the cake recipe from you! So here it is. The cake has diced apples, walnuts apple liqueur and cinnamon. The icing has homemade caramel (so addictive), cream cheese and butter. Uh can an icing get any better than that? I halved the recipe and unfortunately forgot to half the amount of caramel in the frosting so my frosting was way more liquidy than it was supposed to be, but delicious nonetheless! My family and I really enjoyed this cake and I'll definitely make it again.

If this sounds good, you might also like:
Tres Leches Cake
Maple Walnut Cake
Brown Sugar Apple Cheesecake
Applesauce Spice Bars

Apple Walnut Cake with Caramel Cream Cheese Frosting
Adapted from The Magnolia Bakery Cookbook

Makes 1 two layer 9 inch cake

Note: The caramel needs time to cool completely so it would be best to make it the day before.

Caramel
Makes 1 3/4 cup (you will have about 1/2 cup leftover)

1/2 cup cold water
1 1/2 cups sugar
1 cup heavy cream, at room temperature

Cake
2 cups all purpose flour
1 cup whole wheat flour
1 tsp cinnamon
1 tsp baking soda
3/4 tsp salt
1 1/2 cups vegetable oil
2 cups sugar
3 large eggs, at room temperature
3 cups (3 large) golden delicious apples, cut into 1/4" pieces
1 cup coarsely chopped walnuts
3 tbsp apple liqueur or apple brandy

Frosting
1 pound (2 eight ounce packages) cream cheese, softened slightly, cut into pieces
1/2 cup (1 stick) unsalted butter, softened slightly, cut into pieces
1 cup cold caramel

Garnish
Caramel
Walnuts

To make caramel:
In a small saucepan, combine the water and sugar. Set over medium low heat, stirring occasionally, until the sugar dissolves (about 3 minutes), making sure no sugar is sticking to sides of pan. Increase heat to high and boil without stirring, until the syrup becomes a deep amber colour, about 15 minutes. To prevent the syrup from becoming grainy, use a pastry brush dipped into cold water to brush down any sugar crystals sticking to the sides of the pan. Swirl the pan occasionally for even browning.

Once the syrup turns deep amber in colour, immediately remove from heat. Slowly and carefully add the cream to the syrup (mixture will bubble vigorously), whisking constantly, until cream is incorporated.

Return the pan to medium-low heat, stirring until sauce is smooth, about 1 minute.

Remove from heat and allow to come to room temperature before refrigerating. Can be stored for up to one month in refrigerator.

To make cake:
Preheat oven to 325F. Grease two 9x2 inch round cake pans, then line the bottoms with waxed paper.

In a large bowl, whisk together the flours, cinnamon, baking soda and salt. Set aside.

In the bowl of an electric mixer on medium speed, beat the oil with the sugar until smooth, about 3 minutes. Add the eggs one at a time and beat until light, about 1 or 2 minutes. Add the dry ingredients in thirds, beating after each addition until smooth. The batter will be extremely thick and dough like. Fold in the apples, walnuts, and apple liqueur until just blended. Divide the batter between the prepared pans and bake for 45-55 minutes or until a cake tester inserted into center of cake comes out clean. Let cakes cool in pans for 10 minutes. Remove from pans and cool completely on wire rack.

To make icing:
In the bowl of an electric mixer on medium speed, beat the cream cheese and the butter until smooth, about 3 minutes. Gradually add the caramel and beat until well incorporated.

To put the cake together:
When cake has cooled, ice between the layers, then ice top and sides of cake. Drizzle remaining caramel over top of cake. Garnish with walnuts.

Monday, June 7, 2010

Cream Cheese Pound Cake + Strawberry Sauce


One weekend I got it in my head that I wanted to make trifle. I think because the weekend before, my dad had been talking about what an amazing trifle my grandma makes and how people are always sad when she doesn't make it. So I called her to get her recipe but as it turns out there isn't really a recipe. She told me to just use whatever cake you want to get rid of or pick up from the grocery store. She usually uses canned fruit, and mixes the juice from the can with a bit of alcohol (again she said whatever you want to get rid of - are we seeing a theme here?) and pours it over the cake. And then she said she uses pudding mix. And puts whipped cream on top. Oh and she also mixes jello in with the fruit and cake once it's been layered. The details are a bit fuzzy now, but basically there was no exact recipe. So I just decided to pick a cream cheese pound cake, a white chocolate custard, and the strawberry sauce I've made a few times that my fiance (who I will refer to from now on as E) really likes.


Individually, all the components were really good. The pound cake was so perfectly pound cake-y - really dense and wonderful and you can taste the cream cheese. And it was so soft. The white chocolate custard was adapted from a bittersweet chocolate custard and I didn't adjust the sugar enough so it was way too sweet - especially when combined with the strawberry sauce. The strawberry sauce was perfect though and is good for everything. So I'll share with you the recipe for the cream cheese pound cake and the strawberry sauce and will save the white chocolate custard for when I try again and it turns out better.


If this sounds good, you might also like:
Tres Leches Cake
Sour Cream Doughnuts
Strawberry Cream Cake
Orange Cream Cheese Muffins

Cream Cheese Pound Cake
Adapted from Smitten Kitchen who adapted liberally from Staff Meals from Chanterelle

3/4 cup (1 1/2 sticks) unsalted butter, at room temperature
1/2 package (4 ounces) Philadelphia brand cream cheese, at room temperature
1 1/2 cups sugar
3 large eggs
1 teaspoon pure vanilla extract
1 1/2 cups all purpose flour
1/2 teaspoon salt

1. Preheat the oven to 325°F. Lightly butter an 8"x4" pan, then line the bottom with parchment paper.

2. Place the butter and cream cheese in a large bowl and beat with a mixer on medium speed until smooth. Add the sugar, increase the speed to high, and beat until light and airy, at least five minutes. Add the eggs, one at a time, beating after each addition and scraping down the sides of the bowl with a rubber spatula as needed. Add the vanilla, then the flour and salt all at once. Beat just until incorporated.

3. Pour the batter into the prepared pan and shake lightly to even out the top. Bake until the cake is golden brown and a toothpick inserted in the cake comes out clean, 1 1/4 hours.

4. Place the pan on a cake rack and cool for 20 minutes, then remove the cake from the pan and let it cool completely. Serve at room temperature.

Strawberry Sauce
Adapted from All Recipes (Heislord5)

1 pint (454 g) strawberries, cleaned and stemmed
1/4 cup white sugar
1 teaspoon vanilla

Cut about strawberries in 1/2-1 inch size pieces. In a saucepan over medium high heat, combine strawberries, sugar and vanilla. Cook, stirring occasionally, until sauce thickens, about 5 minutes. Remove from heat. Store in refrigerator.

Monday, May 10, 2010

Chocolate Beet Cake with Chocolate Sour Cream Frosting


Thankfully my fiance is an adventurous eater so when we were discussing what kind of cake he should have for his birthday (well actually he got 2 cakes), one of the ones that came up was a chocolate beet cake. Which I've wanted to make forever! And I really fell in love with this cake. Maybe it's because I adore beets and just knowing that they're in there with the chocolate makes me love it. The cake was really moist but not too chocolatey, as there's only 3 ounces of chocolate on it - next time I'd add more or try adding cocoa powder. And lots of people, including myself, couldn't taste the beets but my fiance slightly could. The only bad thing about this cake was that it didn't keep very well - it seemed to lose its moisture quickly. But if it didn't have icing on it and could be kept at room temperature, I don't think that would've been a problem.


So once the chocolate beet cake was decided - next I had to find a yummy chocolate frosting to match! I ended up going with a chocolate sour cream frosting. I've never had a sour cream frosting before and was really intrigued. I ended up loooooving this frosting, and can't wait to try out more sour cream frostings. The only bad thing about this one is that it hardens when it's in the fridge (though I guess they all would if they have chocolate in it) - so make sure your cake is ready to frost when you start making your frosting. And if you want the icing to be soft, take it out of the fridge maybe an hour beforehand to let it warm up a bit before serving.

If this sounds good, you might also like:
Black-Bottom Cupcakes
Chocolate Mousse Layer Cake
Sour Cream Chocolate Cake with Peanut Butter Frosting and Chocolate Peanut Butter Glaze
German Chocolate Cake

Chocolate Beet Cake with Chocolate Sour Cream Frosting
Adapted from Straight from the Farm and Caprial's Desserts

Chocolate Beet Cake
Adapted from Straight from the Farm

1 cup unsalted butter, softened, divided (into 3/4 cup and 1/4 cup)
1 1/2 cup packed dark brown sugar
3 eggs at room temp
3 oz dark chocolate (I'd add more next time)
4-5 medium beets (2 cup pureed)
1 tsp vanilla extract
2 cups all-purpose flour
2 tsp baking soda
1/4 tsp salt

To make beet puree, trim stems and roots off beets and quarter them. Place in heavy sauce pan filled with water. Bring to a boil and reduce to a simmer for 50 mins or until the beets are tender. Drain off remaining liquid and rinse beets in cold water as they’ll be too hot to handle otherwise. Slide skins off and place beets in blender. Process until a smooth puree forms. Let cool slightly before using in cake. You can make the puree ahead of time and store it in the fridge.

In a mixing bowl, cream 3/4 cup butter and brown sugar. Add eggs one at a time, mixing well after each addition. Melt chocolate with remaining butter in the microwave on high in 20 second intervals, stirring each time until smooth. Cool slightly. Blend chocolate mixture, beets and vanilla into the creamed mixture. The batter will appear separated so don’t fret.

Combine flour, baking soda, and salt; add to the creamed mixture and mix well. Divide batter into two greased and floured 8" round cake pans. Bake at 375F for 25-30 minutes or until a toothpick inserted near the center comes out clean. Cool in pan 15 minutes before removing to a wire rack. Cool completely before assembling cake.

Chocolate Sour Cream Frosting
Adapted from Caprial's Desserts

The recipe says this makes enough to fill and frost one 9 inch layer cake, and I did an 8 inch layer cake which isn't hugely different - yet was left with TONS of leftover icing (about 4 cups). So I'd recommend making about 2/3 of this or having an idea of what you want to do with the leftovers!

10 ounces unsweetened chocolate
1 pound cold unsalted butter, diced
3 1/2 cups powdered sugar, sifted (I'd use less next time, maybe 2 1/2-3 cups)
pinch of salt
1 tsp pure vanilla extract
1 cup sour cream

Place the chocolate in a metal bowl over a pan of simmering water. Once the chocolate has melted about halfway, remove the pan from the heat (leave the bowl in the pan) and let the chocolate finish melting. Meanwhile, place the butter in the bowl of a mixer with the paddle attachment and beat until very light and fluffy, scraping down the sides of the bowl often, about 5 minutes. With the mixer on low speed, slowly add the melted chocolate, and then stop the mixer and scrape down the bowl. Add the powdered sugar, very carefully turn the mixer back on at low speed (so you don't get covered in powdered sugar), and mix, again scraping down the sides of the bowl often, until smooth. Add the sale, vanilla and sour cream and mix until the frosting is very smooth.

Saturday, April 17, 2010

Tres Leches Cake


This tres leches cake may not look like anything exciting but it really is. I've wanted to make a tres leches cake for years. But I must admit I was always scared of the cake being mushy because you pour a mixture of condensed milk, evaporated milk and heavy cream over it. And when I say you pour it over the cake I mean you completely drench it. I was happy to find out the cake was actually really nice and moist, and NOT mushy - I'm thinking this works out well because the cake is kind of like angel food cake. Combined with the whipped cream on top, it was perfect. This is a really simple but unforgettable cake! Ree suggests topping the cake with maraschino cherries which I looooooove but I know not everyone feels the same so I left them off.

If this sounds good, you might also like:
Maple-Walnut Cake
Lemon Lust Cake
Strawberry Cream Cake
Creamy Coconut Cake

Tres Leches Cake
Adapted from The Pioneer Woman

1 cup All-purpose Flour
1 1/2 teaspoon Baking Powder
1/4 teaspoons Salt
5 whole Eggs, separated into yolks and whites
1 cup Sugar, Divided
1 teaspoon Vanilla
1/3 cups Milk
1 can Evaporated Milk
1 can Sweetened, Condensed Milk
1/4 cups Heavy Cream

FOR THE ICING:
1 pint Heavy Cream, For Whipping
3 Tablespoons Sugar

Preheat oven to 350F. Butter a 9 x 13 inch pan.

In a large bowl, whisk together the flour, baking powder, and salt.

Beat egg yolks with 3/4 cup sugar on high speed until yolks are pale yellow. Stir in milk and vanilla. Pour egg yolk mixture over the flour mixture and stir very gently until combined.

Beat egg whites on high speed until soft peaks form. With the mixer on, pour in remaining 1/4 cup sugar and beat until egg whites are stiff but not dry.

Fold egg white mixture into the batter very gently until just combined. Pour into prepared pan and spread to even out the surface.

Bake for 35 to 45 minutes or until a toothpick comes out clean. Turn cake out onto a rimmed platter and allow to cool.

Combine condensed milk, evaporated milk, and heavy cream in a small pitcher. When cake is cool, pierce the surface with a fork several times. Slowly drizzle all but about 1 cup of the milk mixture—try to get as much around the edges of the cake as you can.

Allow the cake to absorb the milk mixture for 30 minutes.

In an electric mixer with the whisk attachment, whisk together the heavy cream and sugar until peaks form. Spread over the cake.

Thursday, March 4, 2010

Deluxe Boston Cream Pie


I made this cake a really long time ago - like last summer for my birthday. I never posted about it because I didn't extremely love it. But photos of the cake have been sitting and waiting for their turn, and looking back on my recipe notes I see that I wrote that the vanilla diplomat cream filling was super yummy, and the cake overall was good - I'm just really nitpicky! I think I was disappointed because I didn't really like the buttermilk cake, but then it was the spongey kind and as I've said a million times, I prefer dense cakes. Though I think this style of cake is just the way it's supposed to be for a boston cream pie, because that's what it was like when I made one of my first Daring Bakers' challenges bostini cream pie. So maybe it's just me, and not the cake. I would make this cake again but with a different buttermilk cake, use less filling (it oozed out and the top layer of the cake slid off, yikes), and use less whipped cream frosting.

I haven't made anything else from Baking for All Occasions - any recommendations?

If this sounds good, you might also like:
Orange Chocolate Chunk Cake
Lemon Lust Cake
Strawberry Cream Cake
Tiramisu Cake

Deluxe Boston Cream Pie
Adapted from Baking for All Occasions

Buttermilk Cake
1 3/4 cups (200 grams) cake flour
1/2 tsp baking powder
1/2 tsp baking soda
1/4 tsp salt
2/3 cup (165 mL) well-shaken buttermilk
1 tsp pure vanilla extract
5 1/2 ounces (1 1/3 sticks) unsalted butter, at room temperature
1 1/3 cups granulated sugar
3 large eggs, lightly beaten

Vanilla Diplomat Cream Filling
1 cup whole milk
1/2 cup granulated sugar
1 tsp vanilla extract
3 large egg yolks
3 tbsp all purpose flour
2 tbsp unsalted butter

2/3 cup heavy cream
1 tsp vanilla extract
1 tsp dark rum

Whipped Cream Frosting and Dark Chocolate Glaze
2 cups heavy cream
10 ounces semisweet chocolate, finely chopped

To make the buttermilk cake:
Center a rack in the oven and preheat the oven to 350F. Butter a 9 by 2 3/4-inch round springform pan, then flour it, tapping out the excess flour. Or, lightly coat with nonstick spray and flour the pan. Line the bottom with parchment paper.

Sift together the flour, baking powder, baking soda, and salt; set aside. In a small bowl, stir together the buttermilk and vanilla; set aside.

In the bowl of a stand mixer fitted with the paddle attachment, beat the butter on medium speed until it is lighter in color, cling sot the sides of the bowl, and has a satiny appearance, 30 to 45 seconds. Increase the speed to medium-high and add the sugar in a steady stream, stopping the mixer occasionally to scrape down the sides of the bowl. Continue to beat on medium speed until the mixture is lighter in colour and fluffy, 3 to 4 minutes.

With the mixer on medium speed, add the eggs, 1 to 2 tablespoons at a time, beating after each addition until incorporated. If at any time the batter appears watery or shiny (signs of curdling), increase the speed to medium-high and beat until the batter is smooth again. Then return to medium speed and resume adding the eggs, beating until smooth, stopping the mixer as needed to scrape down the sides of the bowl.

On the lowest speed, add the flour mixture in three additions alternately with the buttermilk mixture in two additions, beginning and ending with the flour mixture and mixing only until incorporated after each addition. Stop the mixer after each addition to scrape down the sides of the bowl.

Pour the batter into the prepared pan. With the rubber spatula, spread the batter form the center outward, creating a slightly raised ridge around the outside rim.

Bake the cake until it springs back when lightly touche din the center, a wooden toothpick inserted in the center comes out free of cake, and the sides are beginning to come away form the pan, 30 to 35 minutes. Transfer to a wire rack and let cool in the pan for 5 to 10 minutes.

Slip a small metal spatula between the still-warm cake and the pan and run the spatula carefully along the entire perimeter of the pan. Release the springform claps and remove the sides. Transfer cake to cooling rack. Let cool completely.

To make the vanilla diplomat cream filling:
Rest a fine-mesh sieve over a 1 quart bowl and set nearby for straining the pastry cream later. Pour the milk and 1/4 cup of the sugar into a 1 1/2 quart saucepan. Add the vanilla.

In a small bowl, whisk the egg yolks until blended, then whisk in the remaining 1/4 cup sugar. Add the flour and whisk to combine; set aside. Bring the milk mixture just to a boil over medium heat. Remove from the heat and pour half of the milk mixture into the yolk mixture while whisking constantly. Return the combined mixture to the saucepan and whisk to combine. Return to medium heat and heat, stirring constantly, until the mixture just comes to a boil, 1 to 2 minutes. It will have thickened at this point. Continue to stir and simmer until it is smooth and thick, about 1 minute more. Remove from the heat, add the butter, and stir until the butter is melted and incorporated. Pour through the sieve into the bowl. Set aside to cool for 15 to 20 minutes. (Once it has cooled, you can refrigerate it in a sealed container for up to 3 days.)

To assemble the dessert:
In a medium, deep bowl, using a whisk or a handheld mixer, whip the heavy cream until soft peaks form. Refrigerate briefly while splitting the cake.

Using a 12 inch serrated knife, split the cake in half horizontally. Place the bottom layer, cut side up, on your cake plate. Spoon about 1/2 cup of the whipped cream into a pastry bag fitted with a 5/16 inch plain open tip. Pipe a line of the whipped cream around the edge of the cake layer. Stir the vanilla and rum into the cold pastry cream until smooth. Then fold the remaining whipped cream into the pastry cream. Spoon the filling evenly over the cake layer. Using an offset spatula, spread it evenly just to the line of whipped cream. Center the other cake layer, cut side down, on top.

To make the whipped cream frosting and dark chocolate glaze:
In a medium deep bowl, using a whisk or handheld mixer, whip 1 cup of the cream until soft peaks form. Using a metal icing spatula, frost the top and sides of the cake with the whipped cream. Place the cake uncovered in the freezer for 40 minutes only (this is just enough time to chill the whipped cream frosting.)

While the cake is in the freezer, prepare the chocolate glaze. Put the chocolate in a medium bowl. In a small, heavy saucepan, bring the remaining 1 cup cream just to a boil over medium-low heat. Pour the hot cream over the chocolate, let stand for about 20 seconds, and then whisk until smooth and shiny. Set aside to cool to body temperature.

Take the cake out of the freezer. Pour the chocolate glaze over the cake to cover the top and sides, using the metal icing spatula to assist in spreading the glaze over the top and down the sides. Refrigerate for at least 30 minutes before serving.

To serve, dip the blade in hot water and wipe dry with a towel before each cut.

Sunday, February 28, 2010

All-In-One Holiday Bundt Cake


As I'm sure many of you know, I cannot say enough good things about Dorie Greenspan's Baking: From My Home To Yours. A recent favourite of mine from her cookbook is the all-in-one holiday bundt cake - spices, pumpkin, apple, cranberry and pecans. I wasn't sure how they would all work together, but trusted Dorie and of course it was delicious. The cake is so yummy, moist, and flavourful. I've made it a couple of times and would say that adults love it, but kids/teenagers might not feel the same - maybe it's the spice and/or the lack of chocolate? I know I'll be making this cake many more times, and I want to try modifying it a bit to make it healthier so I can eat it more often.


If this sounds good, you might also like:
Orange Chocolate Chunk Cake
Cinnamon Swirl Buttermilk Pound Cake
Maple-Walnut Cake
Plum Sour Cream Kuchen

All-In-One Holiday Bundt Cake
Adapted from Baking: From My Home To Yours

1 cup all purpose flour
1 cup whole wheat flour
1/2 tsp baking soda
2 tsp ground cinnamon
1/8 tsp nutmeg
1/8 tsp cloves
1/4 tsp salt
1 tsp ground ginger
1 1/4 sticks (10 tbsp) unsalted butter, at room temperature
1 cup sugar
1/2 cup (packed) light brown sugar
2 large eggs, at room temperature
1 tsp pure vanilla extract
1 1/4 cups canned unsweetened pumpkin puree
1 large apple, peeled, cored and finely chopped
3/4 cup dried cranberries
1 cup pecans, coarsely chopped

Center a rack in the oven and preheat the oven to 350F. Butter a 9 to 10 inch (12 cup) Bundt pan. Don't place the pan on a baking sheet - you want the oven's heat to circulate freely through the Bundt's inner tube.

Whisk together the flours, baking powder, cinnamon, nutmeg, cloves, salt, and ground ginger.

Working with a stand mixer, preferably fitted with a paddle attachment, or with a hand mixer in a large bowl, beat the butter and both sugars together at medium speed until light and fluffy. Add the eggs one at a time, and beat for 1 minute after each addition. Beat int he vanilla. Reduce the mixer speed to low and add the pumpkin and chopped apple - don't be concerned if the mixture looks curdled. Still on low speed, add the dry ingredients, mixing only until they are incorporated. With a rubber spatula, stir in the cranberries and pecans. Scrape the batter into the pan and smooth the top with the rubber spatula.

Bake for 60 to 70 minutes (mine took 50 minutes), or until a thin knife inserted into the center of the cake comes out clean. Transfer the cake to a rack and cool for 10 minutes before unmolding, then cool to room temperature on the rack.

Sunday, February 21, 2010

300th Post! And Sour Cream Doughnuts


Heart shaped sour cream doughnuts!


Wow this is my 300th post! What better way to celebrate that than with doughnuts? My friend and I got together last week to bake and decided on doughnuts - something I've always wanted to make but was a bit scared, because for some reason they seemed daunting and difficult, and I was also frightened at the amount of oil I'd have to use. Well it turns out, doughnuts are extremely easy to make. It did use a lot of oil (probably 2 cups of oil per batch) but it's a small price to pay for delicious fresh doughnuts. We decided on two kinds - beignet souffles and sour cream doughnuts (my favourite!)


Beignet souffles in random shapes


The beignet souffles turned out okay. It was fun piping the dough directly into the hot oil, but the relatively small icing tip we used resulted in very skinny doughnuts instead of nice fat ones. And these doughnuts are definitely only good on the day they're made.


Next were the sour cream doughnuts which were perfect and everything I could have hoped for in a homemade doughnut! Nice slightly crispy edges, perfect cakey insides. So very insanely addictive. The only thing I'd keep in mind next time is to not have the dough too thick because the ones that were too thick didn't get cooked completely on the very middle. Not that it really stopped me from eating them. I'm super happy we made doughnuts, but I don't think I'll make doughnuts again anytime soon - for me they're kind of like croissants, I'm really happy I've made them but don't need to make them very often. Though I think I'd like to try this sour cream doughnut recipe baked.


Can you tell that the doughnut holes are heart shaped? I preferred the doughnut holes to the doughnuts!


The original recipe has cinnamon and orange zest but my friend was wary so we just kept them plain. You could easily modify the recipe to whatever flavours you like. We also opted not to glaze them because they were already perfect as is but you could easily fancy these up with glazes, streusels, chocolate ganache, etc. A coffee sour cream doughnut with a white chocolate ganache sounds good to me. Oh and I totally won my friend over into loving sour cream doughnuts.

If this sounds good, you might also like:
Plum Sour Cream Kuchen
Croissant Pockets with Apricots and Brie
Orange Cream Cheese Muffins
Cinnamon Swirl Buttermilk Pound Cake

Sour Cream Doughnuts
Adapted from Bon Appétit | October 2004

Use a clip-on deep-fry thermometer to gauge the oil temperature when frying these doughnuts: too low and they'll absorb oil, turning leaden and soggy; too high and they'll burn before the insides are cooked through.

The recipe says it will yield 24 doughnuts and 24 doughnut holes, but we got 12 doughnuts and 12 doughnut holes.

3 1/2 cups all purpose flour
1 tablespoon baking powder
1 teaspoon salt
1/2 teaspoon baking soda
1 cup sugar
2 large eggs
1/2 teaspoon vanilla extract
1/3 cup melted unsalted butter, cooled briefly
1 cup sour cream

Canola oil (for deep-frying)

Whisk first 5 ingredients in medium bowl to blend. Using electric mixer, beat sugar and eggs in large bowl until very thick, about 3 minutes. Beat in orange peel and vanilla. Gradually beat in butter; beat in sour cream in 2 additions. Gently fold in dry ingredients in 4 additions (dough will be slightly sticky). Cover; set aside 1 hour.

Sprinkle 2 rimmed baking sheets lightly with flour. Press out 1/3 of dough on lightly floured surface to 1/2- to 2/3-inch thickness. Using 2 1/2-inch-diameter round cutter, cut out dough rounds. Arrange on floured sheets. Repeat with remaining dough in 2 more batches. Gather all dough scraps. Press out dough; cut out more dough rounds until all dough is used.

Using 1-inch-diameter round cutter, cut out center of each dough round to make doughnuts and doughnut holes.

Line 2 baking sheets with several layers of paper towels. Pour oil into large deep skillet to depth of 1 1/2 inches. Attach deep-fry thermometer and heat oil to 365°F to 370°F. Fry doughnut holes in 2 batches until golden brown, turning once, about 2 minutes. Using slotted spoon, transfer to paper towels. Fry doughnuts, 3 or 4 at a time, until golden brown, about 1 minute per side. Using slotted spoon, transfer doughnuts to paper towels. Cool doughnuts and doughnut holes completely.

Tuesday, January 26, 2010

Orange Chocolate Chunk Cake

Thanks everyone for all the congratulations on our engagement. =) Very sweet of you all! We're still trying to pick a date, which is kind of hard to do with my school schedule but I'm sure we'll figure something out soon.


I seem to be making a lot of bundt cakes recently - which I think means that I'm justified in buying another bundt pan like the rose shaped Nordic Ware one, don't you agree? This cake turned out quite soft, so for me it wasn't perfect (I prefer dense cakes to fluffy ones) but everyone else loved it. The cake tastes like a Terry's chocolate orange so if you like those you will definitely like this! The cake itself has orange juice and zest, as well as chocolate chunks. (I hate when I forget to zest the orange before juicing it and then have to try to zest a squashed rind.) Then it has an orange syrup that's put on shortly after coming out of the oven (which soaks into the cake) and then a chocolate ganache is spooned on top. It's quite the cake!

If this sounds good, you might also like:
Orange Cream Cheese Muffins
Cinnamon Swirl Buttermilk Pound Cake
Orange Berry Muffins
Lemon Lust Cake

Orange Chocolate Chunk Cake
Adapted from Smitten Kitchen adapted from Barefoot Contessa Parties!

2 cups unsalted butter, room temperature
2 cups sugar
4 extra-large eggs, room temperature
Zest from 4 large oranges
3 cups all-purpose flour plus 2 tablespoons (I used 420 g.)
1/2 teaspoon baking powder
1/2 teaspoon baking soda
1 teaspoon salt
1/4 cup freshly squeezed orange juice
3/4 cup buttermilk, room temperature
1 teaspoon vanilla extract
2 cups semisweet chocolate chunks

Syrup
1/4 cup sugar
1/4 cup freshly squeezed orange juice

Ganache
8 ounces semisweet chocolate chips
1/2 cup heavy cream
1 teaspoon instant coffee granules

1. Preheat the oven to 350°F. Grease a 10-inch Bundt pan.

2. Cream the butter and sugar in the bowl of an electric mixer fitted with the paddle attachment for about 5 minutes, or until light and fluffy. Add the eggs, one at a time, then the orange zest.

3. Sift together 3 cups flour, the baking powder, baking soda, and salt in a large bowl. In another bowl, combine the orange juice, buttermilk, and vanilla. Add the flour and buttermilk mixtures alternately in thirds to the creamed butter, beginning and ending with the flour. Toss the chocolate chunks with 2 tablespoons flour and add to the batter. Pour into the pan, smooth the top, and bake for 45 minutes to 1 hour, until a cake tester comes out clean. Let the cake cool in the pan on a wire rack for 10 minutes.

4. Meanwhile, make the syrup. In a small saucepan over medium-low heat, cook the sugar with the orange juice until the sugar dissolves. Remove the cake from the pan, set it on a rack over a tray, and spoon the orange syrup over the cake. Allow the cake to cool completely.

5. For the ganache, melt the chocolate, heavy cream, and coffee in the top of a double boiler over simmering water until smooth and warm, stirring occasionally. Drizzle over the top of the cake.

Sunday, December 20, 2009

Toasted Pecan Eggnog Ring


One of the first things I did after finishing my finals was make this eggnog cake! I loooove eggnog so I always want to make baked goods that have eggnog in them. Unfortunately the two eggnog things I've made (eggnog cookies and eggnog bars) didn't really taste strongly of eggnog, so I didn't get my hopes up about this eggnog cake but thought I'd try it. Well, I was super happy when I tasted this cake to find out that it totally tasted like eggnog! I think it's due to not just having eggnog in the cake but also having bourbon and spices. In addition to the wonderful eggnog-y flavour, this cake has a nice soft slightly dense texture. If you like eggnog, I'd highly recommend trying this out while eggnog is still available!


This recipe calls for sifted cake flour, but you know, I really hate sifting flour. So I pretty much never do it. How many of you bakers out there sift your flour? Another random fact about my baking habits is that I rarely toast nuts when a recipe calls for it. This is because I forget I'm toasting them and end up burning half of them. However, for this recipe I paid close attention and toasted them as perfectly as I could! I'm not sure how big a difference it really made though.

If this sounds good, you might also like:
Maple Walnut Cake
Applesauce Spice Bars
Cinnamon Swirl Buttermilk Pound Cake
Mom's Banana Apple Bread

Toasted Pecan Eggnog Ring
Adapted from Great Coffee Cakes, Sticky Buns, Muffins & More

I didn't use the eggnog glaze but I'll include it for those of you who want to try it.

2 1/2 cups plus 1 tbsp cake flour (Ashley note: I used 285 g for the 2 1/2 cups.)
1/4 tsp ground nutmeg
1/2 tsp baking soda
1/2 tsp salt
1 cup premium-quality eggnog
1/4 cup bourbon, such as Jack Daniel's
1 tsp pure vanilla extract
3/4 cup (1 1/2 sticks) unsalted butter, slightly firm
1 1/2 cups (packed) very fresh light brown sugar
3 large eggs
1 cup (4 ounces) coarsely chopped toasted pecans

Eggnog Glaze
1 cup strained powdered sugar, spooned in and leveled
2 tbsp warm eggnog
1 tbsp light corn syrup

1. Position the rack in the lower third of the oven. Heat the oven to 325F. Generously butter a 9 inch bundt pan, dust with flour, then invert it over the kitchen sink and tap firmly to remove the excess flour. Set aside.

2. In a large bowl, whisk together 2 1/2 cups of the flour, the nutmeg, baking soda, and salt. Set aside.

3. In a small bowl, combine the eggnog, bourbon and vanilla. Set aside.

4. Cut the butter into 1 inch pieces and place in the bowl of an electric mixer fitted with the paddled attachment. Mix on medium speed until smooth and lightened in colour, about 2 minutes. Add the brown sugar, 1 to 2 tablespoons at a time, taking 6 to 8 minutes. (Ashley note: Is this really necessary? I'm not sure it is but I did it as she directed.)

5. Add the eggs, one at a time, mixing for 1 minute after each addition. Scrape down the sides of the bowl as needed.

6. Reduce the mixer speed to low. Add the dry ingredients alternately with the eggnog mixture, dividing the flour mixture into three parts and the liquid into two parts, starting and ending with the flour.

7. In a small bowl, toss the pecans with the remaining tablespoon of flour. Remove the bowl from the mixer, and using a large spatula, fold in the nuts. Spoon the batter into the prepared pan, smooth the top, and bake for 1 hour and 10 to 15 minutes. (Ashley note: Mine took about 55 minutes.) The cake is done when the top is firm to the touch and a wooden skewer inserted into the center comes out clean.

8. Remove from the oven and let stand on a cooling rack for 20 minutes. Invert the cake onto the rack and carefully lift off the pan. Turn the cake right side up onto a cooling rack, and place it over a rimmed cookie sheet. If you're going to make the glaze, start it while the cake is cooling.

Make the glaze
9. Whisk the powdered sugar, eggnog, and corn syrup together until smooth.

Finish the cake
10. Using a fork or a whisk, drizzle the glaze over the cake while it is still warm. Let stand at room temperature until the glaze is set.

Store under a glass cake dome or covered with aluminum foil for up to 5 days. This cake may be frozen.

Sunday, December 13, 2009

Maple-Walnut Cake

I'm mostly finished my finals - just one left on Tuesday! Finally started really Christmas shopping and we just bought our first Christmas tree! Exciting. We haven't put any ornaments on it yet because we're waiting to see if Abby will leap into it (she's been pretty good so far). And it snowed today!! I'm hoping for more snow overnight and tomorrow but who knows. We don't get a lot of snow here in Vancouver.


I made this maple walnut cake back in October for my boyfriend's dad's birthday - maple walnut cake with a maple cream cheese frosting. It was really easy to make, and was yummy but unfortunately didn't taste distinctly maple despite the 1 1/2 cups maple syrup in the cake and 2/3 cup maple syrup in the frosting! I think it's hard to get the maple flavour without maple extract or something though - what do you guys think? This cake actually reminded me of carrot cake (and there's nothing wrong with that!) The cake itself was really soft and crumbly (good, but I prefer dense), and the maple cream frosting was super delicious. But how can cream cheese frosting not be delicious?


The method for making this cake is the strangest I've ever encountered. You mix the dry ingredients and then add the butter and maple syrup and beat until blended. I've never beat the flour and butter together before! I'll show you a picture of the inside of the cake, only because if I were you I'd want to see it regardless of what it looked like (the icing is smooshed everywhere, and for some reason there's a backwards slice of cake sitting in front of the rest of the cake).


If this sounds good, you might also like:
Lemon Lust Cake
Brown Sugar-Apple Cheesecake
Applesauce Spice Bars
Carrot Coconut Cake with Cream Cheese-White Chocolate Icing

Maple-Walnut Cake
Adapted from Sky High: Irresistible Triple-Layer Cakes

The frosting is supposed to have 6 cups of sugar - I cut it back to 4 and it was still plenty sweet. I would start making the frosting when you put the cakes in the oven because the frosting involves boiling butter and maple syrup together and letting it cool to room temperature. And as you can see, I made a 2 layer cake so I had 1 layer and icing leftover. My cake carrier doesn't fit 3 layer cakes very well! (Though now I have a new one so this will no longer be an issue yaey.)

Makes an 8 inch triple layer cake; serves 12 to 16

1 1/3 cups walnut halves
3 cups cake flour (Ashley note: I used 350 g.)
1 1/4 cups packed light brown sugar
2 1/4 tsp ground cinnamon
1 3/4 tsp baking soda
3/4 tsp salt
1 1/2 sticks (6 ounces) unsalted butter, at room temperature
1 1/2 cups pure maple syrup, preferably light amber
1 whole egg
1 egg yolk
1 cup milk (Ashley note: I used 1% milk.)
Maple Cream Frosting (see recipe below)

1. Preheat the oven to 350F. Butter three 8 inch round cake pans. Line the bottom of each with a round parchment or waxed paper and butter the paper.

2. Spread out the walnuts on a small baking sheet and toast in the oven until fragrant and lightly toasted, 7 to 10 minutes. Transfer to a dish and let cool. Leave the oven on. When the nuts are cool, set aside 1/3 cup for garnish. Finely chop the remaining toasted walnuts.

3. Combine the chopped walnuts, flour, brown sugar, cinnamon, baking soda, and salt in a large mixer bowl. With the mixer on low, blend well. Add the butter and maple syrup and beat until blended. Raise the speed to medium and beat until light and fluffy, about 2 minutes.

4. In a medium bowl, whisk together the whole egg, egg yolk, and milk. Add this liquid to the batter in 2 or 3 additions, beating until blended and scraping down the sides of the bowl well after each addition. Divide the batter among the 3 prepare pans.

5. Bake for 32 to 35 minutes (I baked mine for 25-28 minutes), or until a cake tester or wooden toothpick inserted in the center comes out clean. Let the cakes cool in the pans for 10 minutes, then turn out onto wire racks, gently peel off the paper liners, and let cool completely.

6. To assemble the cake, place one cake layer, flat side up, on a cake stand or serving plate. Spread 2/3 cup frosting over the layer, spreading it evenly right to the edge. Repeat with the second layer and another 2/3 cup frosting. Set the third layer on top and frost the top and sides with the remaining frosting, swirling the frosting decoratively with an offset palette knife or the back of a spoon. Garnish with the reserved toasted walnut halves.

Maple Cream Frosting
Makes about 3 1/2 to 4 cups

2 sticks (8 ounces) unsalted butter, at room temperature
2/3 cup maple syrup
12 ounces cream cheese, at room temperature
4 cups confectioners' sugar

1. Place the butter in a wide medium saucepan and melt over low heat. Add the maple syrup, raise the heat to medium-low, and boil for 5 minutes, stirring frequently so the syrup does not burn.

2. Pour the hot maple butter into a heatproof bowl and let cool to room temperature.

3. Place the cream cheese in a large mixing bowl and beat well with an electric mixer to lighten. Gradually add the confectioners' sugar and beat until smooth. Scrape down the bowl well and continue to beat until light and fluffy. Add the maple butter and mix until completely blended.

Thursday, November 12, 2009

Easy Nectarine Cobbler


The colours in this photo are kind of weird because I was playing (unsuccessfully) with settings on our new camera. (Not a fancy new camera, just a point and shoot.)


This cobbler is really yummy and easy to put together. The top is like those perfect crunchy muffin tops, and the bottom is buttery and gooey. When I made this recipe, I halved it and baked it in a 5 inch round pan instead of an 8 inch square pan. I made this a while ago and I remember thinking that I had messed up somehow so I ended up making the recipe again immediately - which means I made the whole recipe, in two halves. And I couldn't fit all the nectarines in there - I only ended up using 1/2 cup for 1/2 the recipe (when I was supposed to use 1 1/2 cups nectarines for 1/2 the recipe). Despite my confusion with what I was doing, both halves ended up turning out the same and a delicious time was had by all.

Note: I think this cobbler is different than what's typically thought of as a cobbler (with fruit on the bottom and pieces of biscuit on top). But whatever you call it, it's good!

If this sounds good, you might also like:
Cocoa-Nana Bread
Plum Sour Cream Kuchen
Strawberry Cream Cake
Strawberry Lemon Sunflower Seed Muffins

Easy Nectarine Cobbler
Adapted from Joy the Baker who adapted from The Pastry Queen

If you want you can add whipped cream or iced cream but we ate it without and it was delicious.

1/2 cup (1 stick) unsalted butter
1 cup granulated sugar
1 cup all-purpose flour
1 Tablespoon baking powder
1/2 teaspoon cinnamon
pinch of cloves
3/4 cup milk
3 cups sliced nectarines, skins left on
1/3 cup firmly packed brown sugar

Preheat the oven to 350F. Melt the butter in a medium saute pan set over medium high heat until it bubbles and turns a nut brown color. Watch the butter closely, as it can go from browned to burnt in just a few seconds. The butter will have all sorts of browned bits in it.

Pour the butter into an 8-inch or 9-inch square or round baking dish.

In a medium bowl, whisk together the granulated sugar, flour, baking powder and spices. Add milk and stir.

Pour the mixture on top of the melted butter. Do not stir. Without mixing, arrange the fruit evenly over the top of the batter. Sprinkle with brown sugar.

Bake the cobbler for 40 to 45 minutes, until the top turns golden brown.

Tuesday, August 4, 2009

Lemon Lust Cake


I made this cake for my mom's birthday (almost 2 months ago now - I'm so behind with blogging about what I've made that I look at the photos and have no idea what it is, well that's only happened with some muffins I've made). Anyway, she loves lemon and buttercream icing (and lots of it), so I thought this cake would be a good choice. It's a lemon cake brushed with lemon syrup, filled with lemon cream cheese (cream cheese, whipped cream and lemon curd mmm) and iced with lemon buttercream. You can see why this is called the lemon lust cake! And yes of course the cake was very lemony. The star of the cake was definitely the lemon cream cheese filling, and the cake itself was pretty good but the lemon buttercream on the outside was, well, very very buttery. It's the kind of buttercream that's just butter plain mixed with stuff (in this case, lemon curd). If you eat the cake straight out of the fridge the icing is quite solid (as butter is). I much prefer Swiss meringue buttercream so I'd switch it for that next time.


Now that I'm looking at the photos of the cake I'm thinking I could've fancied it up a bit with some candied lemon slices. But I'm moreso the type to not care too much about how it looks as long as it tastes good. Though candied lemon slices might be delicious - I should make them one day. Looking at the pictures of the slice of cake, it makes me think of those old cars that have long hoods and front ends that stick out on top.

If this sounds good, you might also like:
Strawberry Cream Cake
Creamy Coconut Cake
Lemon Cheesecake
Coconut Lemon Bundt Cake

Lemon Lust Cake
Adapted from The Cake Book

Split the lemon curd evenly for the filling and the icing.

Lemon Cake
3 cups (342 g) cake flour
2 1/2 tsp baking powder
1/2 tsp salt
1 cup (2 sticks/8 oz) unsalted butter, softened
1 3/4 cups (350 g) granulated sugar
4 large eggs
2 tsp finely grated lemon zest
1/4 cup strained freshly squeezed lemon juice
2/3 cup whole milk

Lemon Curd
8 large egg yolks
1 1/4 cups (250 g) granulated sugar
2 tsp finely grated lemon zest
3/4 cup freshly squeezed lemon juice
pinch of salt
1/2 cup (4 oz) unsalted butter, cut into tablespoons

Lemon Cream Cheese Filling
3/4 cup heavy cream
4 ounces (113 g) cream cheese, softened
1/2 tsp vanilla extract
1/2 recipe lemon curd

Lemon Soaking Syrup
1/3 cup (80 mL) water
1/4 cup freshly squeezed lemon juice
1/2 cup granulated sugar

Lemon Buttercream
1 1/2 cups (12 oz) unsalted butter, softened
1/2 recipe Lemon Curd
Pinch of salt

Make the lemon curd:
1. Set a fine mesh sieve over a medium bowl and set aside. In a medium heavy nonreactive saucepan, whisk together the egg yolks, and sugar until blended. Stir in the lemon zest and juice, salt, and butter and cook over medium heat, whisking constantly, until the mixture thickens, 7 to 10 minutes (do not let the custard boil, or it will curdle). The mixture should leave a path on the back of a wooden spoon when you draw your finger across it. Immediately strain the mixture through the sieve, pressing it through with a rubber spatula.

2. Set the bowl containing the lemon mixture in a large bowl filled about one-third of the way with ice water (be careful that the water doesn't splash into the lemon mixture). Stir the mixture frequently until it is slightly chilled, about 15 minutes. Put the curd into an airtight container with a lid and refrigerate until ready to use.

Make the cake:
3. Position a rack in the center of the oven and preheat the oven to 350F. Grease the bottom and sides of two 9 inch round cake pans. Line the bottom of the pans with parchment paper.

4. Whisk together the cake flour, baking powder, and salt into a medium bowl. Whisk to combine, and set aside.

5. In the bowl of an electric mixer, using the paddle attachment, beat the butter at medium speed until creamy, about 30 seconds. Gradually add the sugar and beat at high speed until well blended and light, about 3 minutes. Scrape down the sides of the bowl with a rubber spatula. Reduce the speed to medium and add the eggs one at a time, beating well after each addition and mixing until blended. Beat in the lemon zest and lemon juice until blended. Reduce the speed to low and add the flour mixture in three additions, alternating it with the milk in two additions and mixing just until blended. Scrape the batter into the prepared pans, dividing it evenly, and smooth the tops with a rubber spatula.

6. Bake the cakes for 22 to 25 minutes, until they are golden brown around the edges and a toothpick inserted into the center comes out clean. Cool the cakes in the pans on wire racks for 15 minutes.

7. Invert the cakes onto the wire racks and let cool completely.

Make the filling:
8. In the bowl of an electric mixer, using the whisk attachment, beat the heavy cream at high speed until firm peaks form. Transfer the whipped cream to a smaller bowl, cover and refrigerate.

9. In the same mixer bowl (no need to wash it), using the paddle attachment, beat the cream cheese at medium speed until very creamy, about 2 minutes. On low speed, beat in the vanilla extract. Add the lemon curd and beat at medium speed until well blended and smooth, about 1 minute. Remove the bowl from the mixer stand and, using a rubber spatula, gently fold in the whipped cream until almost completely blended. Cover the bowl and refrigerate while you make the syrup and buttercream.

Make the syrup:
10. In a small pot, combine the water, lemon juice, and sugar and bring to a boil over medium-high heat, stirring occasionally to dissolve the sugar. Remove the pan from the heat and set aside at room temperature.

Make the buttercream:
11. In the bowl of an electric mixer, using the paddle attachment, beat the butter at medium speed until creamy and light, about 2 minutes. At medium speed, gradually add the lemon curd, a large spoonful at a time, then add the salt and beat at medium-high speed until creamy and light, about 1 1/2 minutes. Set aside at room temperature while you assemble the cake.

Assemble the cake:
12. Using a long serrated knife, trim off the domed tops of the cakes so that they are even (save any cake pieces and crumbs for snacking). Cut each cake horizontally into 2 layers. Reserve one of the flat bottom layers for the top of the cake. Place another layer cut side up on a cardboard cake round or flat serving plate. Generously brush with some of the lemon syrup. Spoon a scant cup of the filling onto the cake and, suing a small offset metal spatula, spread it into an even layer, leaving a 1/2 inch border around the edge of the cake. Top with another cake layer and brush it with more syrup. Top with another scant cup of filling. Repeat with another layer, more syrup, and the remaining filling. Brush the cut side of the reserved cake layer with the remaining syrup. Place the layer cut side down on top of the cake.

13. Frost the sides and top of the cake with the buttercream. Serve the cake or refrigerate it. If it has been refrigerated, let stand at room temperature for about 45 minutes before serving.